So my sweet aunt taught me how to make these darling onesie nightgowns for newborns.
I'll eventually get to posting how to make one of those!
And since my baby girl isn't a new born anymore I decided to do pretty much the same thing except for add some ruffles at the bottom and of course make it more of a dress rather than a nightgown.
So here we go.
Lots of pictures and instructions.
 Buy some cute fabric.
I bought 3/4 a yard for the actual dress part and 1/4 a yard for the ruffles.
It just depends how many ruffles you want. I did 4 layers I think.
 Buy a onesie or use one you already have. (Lightly used)
My little one is a bit small for her age so I used the size 3-6 month.
 Now you are going to want to do a small zigzag stitch all around the edges.
If you have a serger that would work perfect.
But if you have no money like me, the zigzag stitch will work great!
 Make sure you do it on the very edge of it so that you are sort of singeing up the sides.
This step just helps make things look nice.
 Then you are going fold the fabric hamburger way, NOT hotdog way, putting right sides together and sew straight down the edge. Make sure you just use a regular stitch not zig zag.
Use between a 1/2 inch to 1 inch seam.
Iron the seam open.
 Choose a side of your fabric to be the top and sew a basting stitch around it. I changed the stitching size to 4.5. I also used about a 1 inch seam. Make sure you leave extra thread at the end so that you can pull it to gather.
NO back stitching on this part!!
 Pull both strings to gather the fabric to the size of waist you want.
I do a little at a time and move the fabric as I do it.
Try to make the gathering equal all around.
Don't pull too hard or you might break the strings and then you will just have to redo the basting stitch.
No worries if you do though. I've done it tons.
 Now, place your little onesie upside down in your fabric with the back of it lined up with the back of the bottom fabric.
(Where your seam is)
 Pin it.
Not too many pins I usually just put one on each side and one in between.
Whatever works for you.
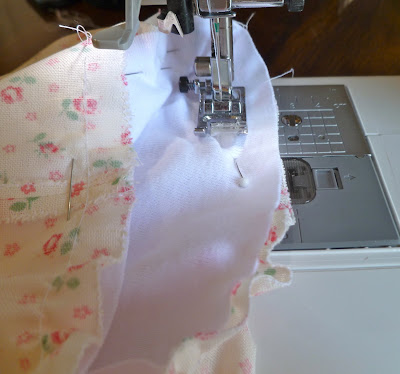
 Use a regular sized straight stitch and sew around the inside of the dress. I used a 1 inch seam. Make sure you pull your pins out.
And DO NOT pull the fabric tight, it will ruin the gather. Just sort of follow along helping keep things gathered.
 Then, cut off any extra fabric on the edge. Don't get too close or worry about it being straight.
I promise it doesn't matter.
 Flip it right side out and look what you have!
Oh ya if it is too long just cut the fabric to the length you want.
And then zigzag around the bottom of your dress.
 Now for the ruffles.
Cut your strips of fabric.
I did about 3 1/2 inch strips.
Zigzag around all sides of the fabric.
Do a basting stitch along the top of the strip and pull to ruffle.
Pin it on the dress where you want it and sew over the basting line.
That's it.

 Isn't it so very cute?
This was just my experimenting dress so I'm so excited to try more!
You could even do ruffles all up the top of the waist.
It might take a while but it would be darling.
Feel free to ask any questions.
I'm sure I can be a bit confusing.
Pin It


She's beautiful and I love this dress! Maybe for my little one's first birthday?
ReplyDeleteThank you!!! It really is a cute little dress, it's fun to pick out your own fabric! If you do make one I'd love to see it:)
Delete